Building a parrot nestbox is quite a fun and easy building project for you as a pet owner. Regardless if you intend to breed parrots or maybe you just want to keep one as a pet, you can now just easily make a nice habitat for your parrot to live in. Using the right tools, you can build your own parrot nest box that your pet will surely love. Let’s get started, so you’ll learn how to build a parrot nestbox.
Collecting Materials to Used
You’ll need to get some wood panels to create a nestbox. The nestbox that you are going to make is made of wood. Happy parrots love to chew, so if its a nestbox is just made of cardboard, then it would be easy for parrots to shred it up.
Here’s are some tips when preparing the materials for your parrot’s nestbox:
1. Buy Some Wood Molding
Try to look in hardware stores and grab some wood molding to use as a panel to build your parrot’s nestbox. Using panels of plywood boards usually works best than other kinds of wood. Get a wood that is about 1.5 up to 2 centimeters (.6 to .8 inches) thick. However, it is also good if it is a little bit thicker.
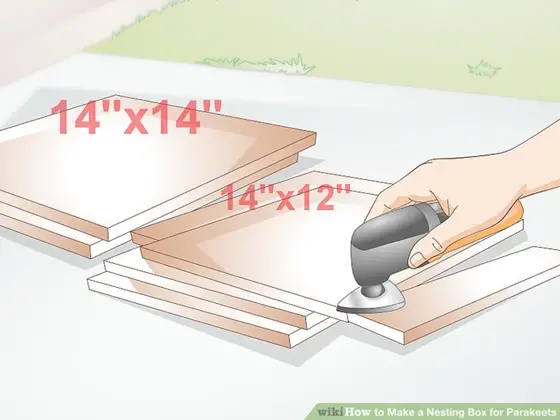
Cut the wood into four panels for at least 12 x 14 inches (30.5 x 35.5 centimeters) in size and another two panels for about 14 x 14 inches or 35.5 x 35.5 centimeters. The overall measurement is about 90 square feet. Just make sure that you have enough wood supply to ensure that you ‘ll not run out of material to build a nestbox for your parrot.
2. Gather the Tools Needed
Get the required tools to use when building a nestbox. You may need some construction tools to build the nestbox.
Here are some examples of tools you need to prepare:
- Circular Saw: The first one that you need to have is a circular saw. Sometimes you don’t get the wood with a size that you need at the hardware store, so you are required to cut it by yourself. And the best way to acquire the straight size that you may need is a circular saw.
- Rotary Cutting Tool: You may also use some kind of rotary cutting tool. It works like a power saw, but with a long, slender blade used in cutting holes. It is also used to cut around the entrance for the nest box.
- Power Drill: The power drill is also needed to drill some holes in assembling the box. You may require having also a hammer because you need to nail the panel together, so a hammer is essential to use and do not forget the nails as well. For a proper measure, used some ruler or either a tape measure to have a correct measure when you’re cutting the wood.
General Tips When Using Tools in Building a Nestbox
Get the essential safety types of equipment. Avoid using power tools without the use of any proper protection. To secure your safety, choose materials and tools that you’re knowledgeable using and are safe before you start doing the nest box.
Here are some tips when using tool sin building a nestbox for your parrot:
1. Protect your eyes using goggles, eyewear, or some safety glasses, most especially when you’re using a power saw or even drill. Any debris can accidentally fly into your eyes and may cause pain or damage.
2. Protecting your ears is also considered a must. It’s because power tools are usually loud, and long-time exposure to a loud sound might become damaging to hearing. You may use some earplugs or specialized earmuffs to avoid any hearing difficulties.
3. When it comes to handling woods, you might accidentally cut yourself or get some splinter when you are not using gloves. Avoid any injuries by wearing at least a thick pair of gloves.
4. The equipment that is needed for you to use is a dust mask. While you are drilling or sawing sawdust may fly around, and there is a tendency that it could enter the lungs and may cause coughing, sneezing, and other signs of irritation. Wear a dust mask to protect your lungs in any dust that could harm you.
How to Construct a Nestbox
1. Cut the Desired Size of Wood
When it comes to building the box, you have to cut the desired size of wood you need to use. Just make sure that you measure it carefully before cutting. Use a pencil or a carpentry pencil to mark the wood in order to keep your cut align and straight. If you mess up doing this, you may have to buy another wood into the hardware store that might cost more money, as well as wasting some time.
2. Measure the Circumference
In one panel, cut a round hole, which will be the entrance of the nestbox. You may use the rotary cutting tool to cut a circle shape that measures about 3 inches in circumference. Put it close to the floor of your parrot’s cage so that your pet may easily walk right in. Can you still recall the formula of the circumference that is pi(3.14) x the circle’s diameter? Therefore, in order for you to get the right circumference of three, you need at least .95 inches diameter or round it up to 1 inch.
3. Nail It
You nail each side, as well as the bottom, of the box together. Try to have or make a removable top that is more suitable for you as the pet owner so you can clean the nest box easily. To make it, you just need to hold off and put the top of the box.
After you nail all the side panels together, place the one nail in the bottom corner while the other one in the top corner of each panel side. The next to do is to nail the bottom on by just simply putting a nail in every corner. Just make sure to keep the nails straight when you are hammering them, or they might be going off in the center and may pierce inside of the bird’s nest box. If this may happen, just simply take out the nail and try to do it again.
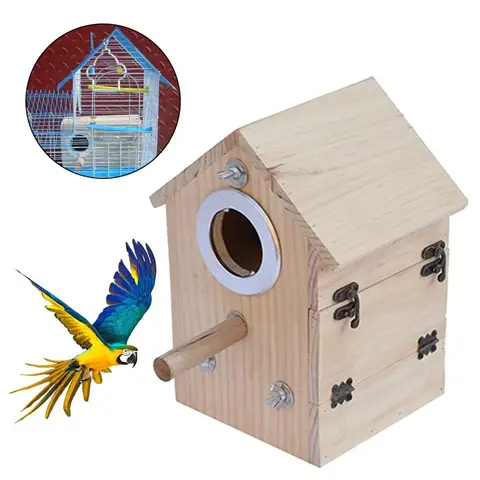
4. Install a Perch
Put a perch underneath the hole in the outside part of the nest box. Provide your parrot a perch so that it can use this thing to land and to step inside the box. You may cut at least a piece of wood a few inches square shape, and to secure it, that it can stay under your hole cut, you may use wood glue.
5. Make a Removable Top
Using a power drill, drill some holes to secure the top of your parrot’s nest box. The easiest way to make the top of the nest box a removable cage is by the use of wire. It will help secure the nestbox. You just need to drill a few holes in it.
Drill two holes on both sides of the box, then drill the parallel holes in the top portion. The next thing to do is to place the top of the box, and you can run some wires through the holes. Tie the wire through holes to secure it that it may stay in the box. Then you can now simply untie the wire and take the top of the nest box off every time you want to.
6. Decorate the Nestbox
You may now decorate the bottom of the nest box. Parrots usually place some natural materials in their nest for them to feel comfortable as well as safety. You can easily imitate these doings by just placing some feathers, straw, or wood shaving inside the nest box. The nesting box must be in a slightly high place; it can’t be on the level of the ground.
Conclusion
Congratulations, you’re now ready to build a nestbox for your parrot. Using the right materials and tools, you’ll create a durable, easy to clean, and beautiful nestbox for your pet. In this way, you’ll show how much you care and love your pet parrot.