At certain times, bird owners need to make decisions when it comes to traveling with their pets. Getting the right information about the requirements and “how-tos” may be difficult when you have a bird for a pet. The good news is that many bird owners have been successful in doing so. Follow this list of recommendations, and experience a planning process that is simplified, stress-free, and enjoyable by both you and your beloved bird.
Preparations before the Flight
The first thing that you can do is to contact that airline that you are planning to take first and check out if they allow the following options – accepting birds in your cabin and making an advanced reservation for your bird. Most airlines will only allow up to two pets of any kind in their cabin for every flight.
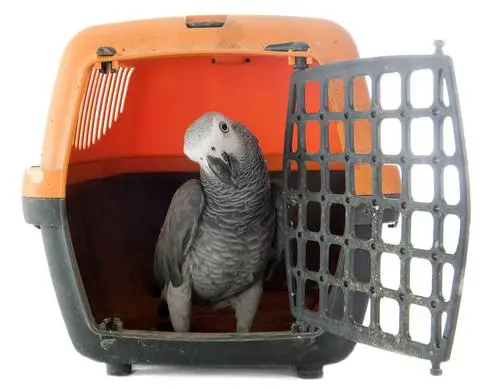
Once you have secured such information, you can then move forward with buying an airline-approved bird cage that can easily fit under the seat in front of you. If you own a bird that is too large for standing upright in this size of cage, you need to either purchase a seat for your caged bird or have it shipped by a company that specializes in this type of shipping requirements. Make sure that the cage comes with a very secure latch.
Other tips include attaching a rough-surfaced perch firmly, such as natural wood or rope toward the cage front. A food dish may also be attached right at the door. Even before traveling, make sure that your bird is already familiar with this new cage.
Before the travel, make sure to clip your bird’s nails and wings. This will make it a lot easier for you to handle the bird while preventing losing your bird if it escapes somehow. You can also fortify the diet of your bird using stress-formula vitamins and minerals for an entire week right before, during, and a week after the travel.
Another thing that needs to be prepared beforehand is obtaining a health certificate for your bird within 10 days of the actual departure. This certificate has a validity of 10 days. If you plan to stay at your destination for over 10 days after the certificate is issued, you need to get a second health certificate for the return trip.
With this in mind, you can check if the airlines have other requirements for this process. If you are traveling to another country, for example, understand that there might be other requirements and that these requirements may be different from your country. For instance, there may be stricter quarantine restrictions upon the return travel.
If you live in the United States and you need to bring your bird abroad, all necessary documents need to be obtained from USDA, as well as the Department of Interior’s U.S Fish and Wildlife Service before leaving the country.
Make sure to label your cage with a sticker that says “live animal.” Include your personal identification and other details, such as where to reach you at your destination. Avoid lining the bottom of the cage. This has something to do with the security issues wherein you may be required to remove your bird, along with all the contents out of the cage, if the bottom is not easily visible.
If there is a need to separately ship your bird, avoid shipping it on a connecting flight. Only use a direct flight if possible, shipping your bird “counter to counter.” In this way, you will not leave your bird in a cold and drafty, or hot area in the cargo waiting for you to pick it up. Instead, it will only be brought inside the terminal of the airline, and into the ticket counter.
At the Airport
Make sure to arrive at the airport earlier, at least two hours early. Confirm first all your flights and connections, if needed. Allow your bird to drink plenty of water. Put water and fresh fruits and vegetables in its food dish. Among the best options include cantaloupe, watermelon, green or red grapes, green, red, or yellow peppers, as well as pumpkin squash and cooked acorn. If these foods are not part of the usual diet of your bird, you might want to start introducing them slowly weeks before your departure.
At the airport during check-in, inform the ticket counter that you have a pet with a reservation. Show the health certificate when asked, and keep both the receipt and the health certificate together. During the X-ray process, you can request that your bird be “hand searched” using a wand.
Stay calm during the entire process, and be cooperative as much as possible. Airline and security personnel may not be unfamiliar with birds, so you need to be patient. As much as possible, stay with your bird when shipping separately. This will also relieve the stress of both you and your bird. Double-check all of your identification requirements and stickers. Confirm your flight arrival if separately shipped, and be prompt in picking your bird up at the arrival counter.
Once onboard the plane, the airline personnel will give you instructions on where to stow your cage. If your cage is small enough, you will most likely be asked to place it under the seat in your front. Drape one of the blankets over the cage loosely, except in front. This will help in preventing the drafts from reaching your bird while still providing circulation.
If you have a large bird and got a separate seat for it, securely strap the cage with the seat belt. This can be done by weaving the belt into two or three bars on each side in the front of the cage before engaging the clasp. You can then drape the cage a blanket for cover.
Airline Approved Bird Carriers
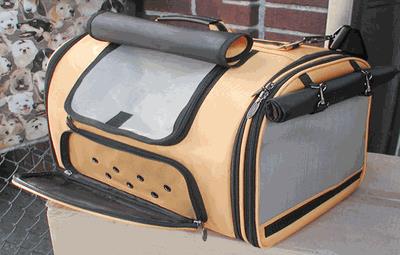
Securing an airline approved bird carrier can be somewhat challenging. The very first thing that you need to take into consideration is whether you need to bring your bird in the cabin, or if they will be placed in the cargo hold.
For a carrier to be acknowledged as IATA compliant, the cage should meet a set of requirements to safely transport your pet. These requirements also apply to other animals.
- Size
In terms of size, a carrier should be big enough for them to freely stand up in and move around without accidentally bumping their heads. It should also be spacious enough that their feathers do not hit the walls as they turn around. Enough space should also be available for a perch so that your bird can easily hold on to something when they need to move around.
- Carrier Door
The door of a carrier should be easy to open in cases of emergency, yet secure enough so that it does not accidentally open. The door should also provide enough visibility and ventilation so that anybody handling the carrier can easily see what is going on inside.
- Handles
A carrier should have a handle that makes loading and unloading of the carrier safe and easy, both for the baggage handler and for your pet. Handles offer a safe point of contact for the handler, which means that they are less likely to suffer a bite. They also offer a secure way to hold a carrier so that your pet will not get as shaken up while being moved.
- Interior
The carrier should also have a solid leak-proof floor. The floor needs to be covered with a material that is absorbent. A recommended option on flooring is a wire mesh floor that comes with a removable pan. It is also a more hygienic solution most of the time.
- Ventilation
The carrier needs to provide a good source of ventilation. While at least 14% of the carrier walls should provide such ventilation, more is preferable. A third of the vents need to be located at the upper half of the carrier, and the rest elsewhere. A rim that sticks out at least 3 inches on the carrier perimeter is also needed so as to prevent the vent holes from being unnecessarily covered by other cargo inside the plane.