If you have a pet bird, then you know how important toys are. Not only will birds have fun playing with them, but toys also develop many aspects of your pet’s physical, mental, and behavioral faculties. Toys help your pet exercise as they climb, fly, pick up, and nibble on their precious and colorful toys. Bird toys also allow birds to socialize with fellow birds in the cage and with you, its caregiver. Also, bird toys help develop a friendly, well-rounded pet that you and your family will enjoy having every day.
The problem with using toys is that pet birds can’t get enough of them! Some birds like large macaws and cockatoos may also destroy toys easily, and thus you need to buy more to please them. But why buy toys when you can make your own out of everyday things you have at home? We have ten of the best DIY toy ideas for pet birds. Find the best one that your bird will love or make all of them instead!
Using coat hangers
Every home has extra coat hangers or old ones but not those that are broken or with parts hanging about because these can hurt your pet. You can recycle these to make a cute and challenging bird toy. For this DIY project, the possibilities are endless, but we have a simple upgrade for a common, outdated coat hanger.
Things you’ll need
- Two or three old hangers
- String or rope
- Long satin ribbons
- Extra pieces of cloth
- Wire (this will be used to secure the materials on the hanger, never use hot glue because your pet may eat it)
- Pliers
- Other bird toys that you can hang
Instructions
- Clean the coat hangers and make sure that there are no parts that are going to fall off or have sharp edges and surfaces that can hurt your pet. Use sandpaper if you must if you are using metal hangers.
- Cover the hanger with different pieces of material. Take note that we will use materials of varying textures and colors. Birds like parrots see the world in full color and will love a very colorful new toy inside its cage.
- Use a long piece of rope and start wrapping the hanger in one area. When you’re done, use a piece of thin wire to secure the ends, but don’t cut it. Allow a long loose end to hang from the coat hanger and tie the end into a large knot. Your birds will love to use this as a swing!
- Try another material like a very long piece of cloth like an old necktie or fabric belt. Wrap it around a section of the coat hanger and again, use wire to secure the ends. Let a long piece dangle from the end like the rope, but you can make this piece longer or shorter if you wish. At the end of this long fabric, tie a large knot
- Use satin ribbons this time and just wrap it around the hanger like the rope and fabric. Use satin ribbons of different colors and textures. The more colorful the toy is, the more your pet will be interested in playing with it.
- Make sure everything is secure, and the wrapped materials won’t fall off when your pet holds them. Do a test and try to pull on the materials one by one.
- When everything turns out ok, it’s time to add different trinkets, toys, and even some food. Place food on strings like stringing some cooked beans, berries, pasta, or nuts. When it comes to toys, string these with strong wire and let these dangle from the coat hanger.
- Secure the newly made DIY toy from an area inside the cage where your birds can easily and safely play with it. It’s best to place it in a corner so that birds that want to rest or perch can be left alone.
Foraging food out of native fans and other safe materials
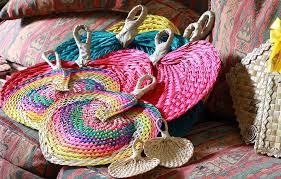
Make your pets work for their food in a fun way. Parrots and other birds are very intelligent and love to be challenged, too, so we will make toys where food can be hidden inside so your pet can play and eat at the same time. There are many safe and easy to find materials around, but we will pay very close attention to a native fan known as a “pamaypay” in Filipino.
This is available in almost all native stores and markets in the Philippines, or you can order online. This is made from the dried leaves of coconut trees or other native trees and plants. This fan can be found in varying shapes, sizes, and colors but we will use a simple, non-colored, non-treated fan. Here are the things you need and the instructions on how to make this simple foraging toy.
Things you’ll need
- Three or more native pamaypays or fans in different sizes
- Metal wire
- Bird food
- Old native baskets and hats
- Pet toys
Instructions
- The very first thing to do is to clean the fans even if these are new. Use a brush to gently remove any dust that may have settled on the fan. If you’re using native baskets, then do this as well. Take note that these fans are woven very tightly and it’s possible to have pests and dirt trapped under the interwoven designs, so take your time brushing the fans but do so gently.
- Take one fan and roll the two sides towards the center. The area where the handle is (the handle is mostly made of the same material as the fan but is oval and hard because this is where the user holds the fan). Create a cone with the area at the opposite of the handle closed.
New fans may be very hard to fold or bend, so take your time bending and folding the fan before forming the cone.
- Once you are satisfied with the shape of the cone, use pieces of wire to secure the shape. Make sure that the closed end is secure and will hold things that you will place inside the folded fan. Reinforce this with several pieces of wire.
- When you’re done with one fan, make two or three more depending on the size of your cage and the number of pet birds you have.
- Now it’s time to fill the fans with all kinds of stuff. Let’s begin with your pet’s most favorite food. If he loves raisin bread, then cut these into small pieces and place the pieces on each one. Add other food and treats that won’t spoil like dried fruits, cookies, pasta, beans, and nuts.
- At the top, cut a small piece of cardboard to make a lid and place this cover on top of the foraging toy. Your pet will be able to smell the food from the material of the fan but can’t see them easily. He needs to open the top to get food, but some impatient birds may destroy the fan instead. But no matter what, this makes a fun and exciting toy for any bird. Make sure to have a lot of fans handy, though. If these are not available near you, you can use old baskets or other materials instead.
- Use the handle as a hanger by placing a thicker wire here and securing it inside your pet’s cage. Like in the first DIY toy, you can also add small toys and trinkets along the sides of the cone fan to prevent your pet from nibbling on the material.
- Place this new foraging toy in the corner of the cage and not in the middle so as not to disturb other birds that may want to sleep or perch.
Install different types of ropes
Birds love climbing and dangling as well as flying. Birds can use ropes to perch from, to condition their feet and nails as well as their beaks. Some birds are also goofy and would love to interact with you or other birds upside down. Ropes allow them to do all these things, plus they are great fun for them as well.
This DIY toy made of rope may be placed inside the bird’s cage or in an aviary, or you can install this in your room so your pet can have a safe and fun place to perch on when out of its cage.
Things you’ll need
- Ropes of different sizes and material
- Wire and pliers
- Plastic or wooden hoops, beads, blocks and other toys
- Pet food
Instructions
- Inspect the ropes that you will be using. If you’re using new ropes, inspect for any pests or dust and, as much as possible, use an untreated rope. Marine ropes and industrial ropes are treated with chemicals to make them stronger, so don’t use these.
If you’re using recycled rope, test it for strength and inspect for any damage or ends that may give in because of the weight of your pet/pets. Use a dry, rough cloth and wipe the surface clean. Also, consider the length of the rope, which should be long enough to be placed across the cage or any room you want to install it.
- Secure the ends of the rope with wire and tie the ends in place first. Doing so will allow you to adjust the middle part of the rope using several wires. Allow several inches of rope on each end to dangle since your bird will love to use this as a swing or a perch. Tie a large knot on each of the ends.
- Be sure that the height where the rope is installed is high enough for your bird to still sit on the rope or perch from it. Think of a laundry line.
- When the rope is ready, you may now tie all kinds of trinkets, toys, and even food from it. Use wire or smaller pieces of rope to secure toys and food.
Consider tying up food that will not spoil easily like a bit of fruit. Use biscuits, pieces of bread, a brownie, a strawberry, grapes, pasta, beans, and nuts. For the toys, make sure that the toys are safe for your pet and should be securely tied to the rope or dangling from the rope.
Make a willow wreath
It’s easy to make a wreath filled with all the stuff that your pet will love to play with and eat. A wreath covered with fresh willow leaves and stems (think of a Christmas wreath!) would do nicely, and it’s easy to make too. But make sure that the size of the wreath is enough to fit inside a cage if this is what you want to make or big enough and stable enough to accommodate your bird or birds.
Things you’ll need
- Wreath circular frame
- Lots of fresh willow leaves and stems
- Wire and pliers
- Food and colorful toys
Instructions
- Take the wooden wreath frame and clean it. Make sure that it’s free from pests, molds, and dirt before use. Use sandpaper to remove dirty surfaces and wipe clean with a rag.
- Take the willow leaves and stems you’ll be using. This must be from a tree that’s not been treated with pesticides or chemicals, and every inch must be inspected so that these are free from pests and molds. Remove rotting, dry, or diseased leaves right away.
- Wrap the wreath frame with willow. Slowly work your way around using a pattern that will not easily break when your pet decides to chew on the branches. Each time you get to the end of a branch or stem, secure this with wire. Make sure that the wire won’t hurt your bird, so cut it very short or cover the wire with the stalks. Once you’re done, inspect your work. It has to be strong, should hold depending on how small your pets are and how many will they be.
- If your wreath holds well (no stems falling or leaves falling, and the structure can be hanged without falling, then you’re ready to proceed), then it’s time to decorate it to the brim. Add trinkets and toys first. Use wire or ribbons to secure these.
- Now hang all kinds of treats and food. Some food that your pet loves like nuts, seeds, and dried fruit may be placed in covered plastic containers. Your pet will have to open the container to get the food in.
- You can hang the wreath like a standard wreath or hang it upside down like chandelier. If you want to do the latter, hang the toys and food lower using ropes. The rope must be very secure and sturdy enough to accommodate your pet. The wreath should also hang farther from the ceiling so your pets can still climb on top to perch. But before allowing your pet to play in his new toy, bird proof everything in the room first.
Make homemade swings
Aside from climbing and flying, swinging on a swing is a way for your pet to get exercise. Also, it helps pets destress as well. To install a swing like a regular playground swing, you need a lot of space, so this toy should only be considered if you have a larger cage or you allow your pet bird to fly out of its cage.
There are many bird swing designs, and we will make one made out of wire, natural wood, and some colorful beads.
Things you’ll need
- A piece of strong wire for the swing’s arch
- A small piece of natural wood like a twig
- Beads of different pieces
- Ribbons, toys, and trinkets
Instructions
- Consider the size of your pet bird. Smaller birds need a small arch for the swing while larger and heavier birds will need a large arch. If your pet is just too large, then consider another design.
- Bend the thick wire using a pattern to make the arch. For instance, use the armrest of a padded sofa to mold the wire to the right arch shape. Or you may use a large PVC pipe. Once you have the correct shape ready, wipe the wire clean, use sandpaper if you have to.
The wire has to be longer on both ends because you will need to secure the ends to the wooden perch.
- Now, prepare the wooden perch for the swing. Just like shopping for perches, this has to be free from any part that can cause splinters or hurt your pet as well. A perch with natural grooves will help condition your pet’s feet and even his beak. Do not add paint to the perch; just let it be.
- Before securing the bent wire on the perch, locate the middle of the arch, and install the hanger for the swing. Use the same wire and just install it on top.
- Add your beads on each end of the wire, and when you’re done, install the wire arch to the perch. You can bend the wire to let it hold on to the perch. If you have a small hand drill, drill a hole through the perch to secure the arch.
- Add some ornaments, toys, and food on the perch but don’t overcrowd the swing with too many toys.
- Now you’re done making a new swing. Install it inside the cage, or you may place it outdoors or in a perching spot indoors.
Add natural foliage
Although this is not a DIY project, you can transform any kind of indoor plant to use as a natural perch for your pet. But to do this, you must first recognize plants that are toxic to birds. Do not use amaryllis, daffodils, holly, ivy, lilies, mistletoe, poinsettias, philodendrons, and morning glories as indoor foliage for your pets to play in.
Things you’ll need
- A safe indoor plant with many branches
- Ribbons of different colors
- Toys
- Food
- Bells
Instructions
- Before you decorate the plant, you have chosen, inspect every inch for anything that can injure or cause harm to your pet. Remember, this plant should be healthy in such a way that this was not treated with pesticides, herbicides, and other chemicals.
Remove wilting, dying, or discolored leaves and cut excess foliage if you want to shape your plant. Inspect the container and the soil. The container must be clean and the soil free from pests and molds. You might be tempted to replant this plant to another container, but we are strongly against it because this can stress your plant.
- When your plant is ready, you may now begin decorating it. Wrap loosely ribbons of different colors. Think of decorating a Christmas tree! Secure the ends of the ribbons by tying them on the branch of the plant
- After the ribbon has been installed, place the toys one by one on different areas of the plant. Make every area interesting and fun for your pet. And to add food, be sure that this food won’t easily rot like fresh veggies and fruits. Use dried food and fruits instead. Use hard bread, biscuits, raw pasta, beans, nuts, seeds, and flowers. Take note that you must not place a lot of food on the tree just enough for your pet to play in. Any leftover should be removed right away, or else pests will be attracted to your pet toy.
- Install this plant inside the cage if the cage is large as a walk-in aviary. You may also let your pets out and play outside the cages. Just make sure the room is bird proof, or you can place your pet in a harness instead.
Old telephone directories
Why is this on the list? Because birds like parrots, macaws, and cockatoos will enjoy tearing up stuff and an old telephone directory will make a good toy to tear apart! You can collect old directories from offices or businesses if you don’t have one. Tearing stuff may not be interesting for you, but this also helps your pet condition its claws and beak.
Things you’ll need
- Old telephone directories
- Strong rope
- Wire
- Toys
Instructions
- Decide how to hang this toy. We will simply hang it from its spine on a perch or wire. But you can do the old fashion way and just set the book on a table, open it from any page and just let your little monster destroy!
- If you decide to hang the toy, take a piece of rope or wire to create a handle. Use a small drill to create two holes, one on the end of each spine.
- Thread the wire or rope through the holes. Tie a knot to keep the rope in place or use pliers to bend the ends of the wire to secure it on the spine of the telephone directory.
- When you’re done, inspect the toy for sturdiness. The wire or rope must hold a heavy directory as well as your pet/pets. If everything checks out, you may now decorate this new toy.
- Use some ribbons and toys to decorate the wire handle and the spine of the directory. A parrot will be persistent and will probably hang upside down just to tear this directory apart! Meanwhile, small birds will gently nibble on the edges of the pages instead. The ribbons, toys, and colorful materials will provide extra stimulation to your pet since the directory won’t be as colorful and as bright as toys.
The problem with this toy is the clean up after your pet is done with it. Don’t throw away the shredded paper, but instead, you can use this to line the cage of other pets.
Cardboard boxes, toilet paper tubes, brown packaging paper
Your pet bird will likely be interested in anything that’s new and weird, not just colorful things. Cardboard boxes of different kinds can make excellent toys for pet birds. Similar to making a dollhouse or a playhouse, you will need cardboard boxes of different sizes and shapes, toilet paper tubes, and packing paper. Make sure that these materials are clean, free from mold and pests.
Things you’ll need
- Cardboard boxes of different sizes and shapes
- Empty toilet paper tubes
- Cutter, scissors
- Ribbons, wires
- Toys
Instructions
- Design a cardboard maze for your pet bird. This project links the many cardboard pieces together and uses doors on each box. We will make a simple maze using three boxes first.
- Close the boxes by using tape.
- Draw a hole like a tunnel hole leading one box to the other. The holes must be big enough to accommodate your pet. Since this tunnel system will just be short, your pet can easily see the toys in or food, and therefore it will stay, play, or eat inside.
- Secure the different ends with wire or tape. The different sections must not move.
- Place this tunnel toy on a spare table and decorate with toys and food inside. Use a wire or a piece of rope to hold the toys and food in the place. Thread the wire or rope through the ceiling of the tunnel and secure these from the outside.
- After the success of this plaything (we know this will be a huge success!), you may consider adding more components to this tunnel system you have made. You can use toilet paper tubes as toys or use larger cardboard boxes to make larger mazes. Let one, two, or three of your pets play at the same time. Clean up is easy, just discard the boxes when playtime is over.
Old children’s toys
Don’t throw away old children’s toys like play gyms, basketball hoops and balls, and other toys. Let your pets play with it. A play gym is a good toy to save because it has all the things your pet bird would want to play with too. There are swings, mirrors, clocks, hoops, and ropes that they can play with all day long. Also, a play gym can work as a perch, but you must wrap this in rope or cloth, especially when this is made from hard plastic.
Things you’ll need
- Old toys, discarded toys
- Ropes, ribbons
- Pet food
Instructions
- Choose appropriate and safe toys. Make sure there’s no broken part. If this is a battery-operated toy, remove the batteries and secure the battery area with strong wire.
- Clean the toy completely and dry in the sun.
- Add ribbons or ropes. You may also hang pet food or use small containers to hide pet food and treats.
Nets made of ropes
Another silly thing that parrots and other birds love to do is hanging upside down from a net. You can do climbing and balancing net out of rope, or you can use an old net at home. A net can also hold toys and food and thus can become a foraging toy.
Things you’ll need
- Rope, a lot of rope
- Wire
- Toys
- Food
Instructions
- Weave a net using a rope. Use rope that’s natural like abaca or cotton rope and not treated rope sold from marine shops and hardware stores. If you are not familiar with net weaving, you can check out tutorials online or on YouTube. This is easy to do and won’t take much time to learn. Consider using a long rope to make a large net for a large bird or several small or medium-sized birds. Tie a knot at the end of the rope to keep the ends together. Your birds will also love nibbling on this knot as well.
- When you’re done, decorate the net with toys that your pet likes. Secure these toys with wire. When you use wire, make sure that there are no wire ends that can hurt your pet.
- Now, install food that won’t spoil easily. Use string to set these in place. Consider food like uncooked pasta, dried fruit, beans, and seeds.
- Install the net in a corner or side of the cage or use it against a wall of the room. Use strong wire or rope to secure the net.
Conclusion
Your pet bird loves to play, but you don’t need to spend too much on toys. You can DIY bird toys using simple materials and tools. And you don’t have to be an expert to make these toys. Just remember that your pet’s safety is still the most important, and to make sure that all the toys and food you add to the toy you’re making are safe for your pets as well.