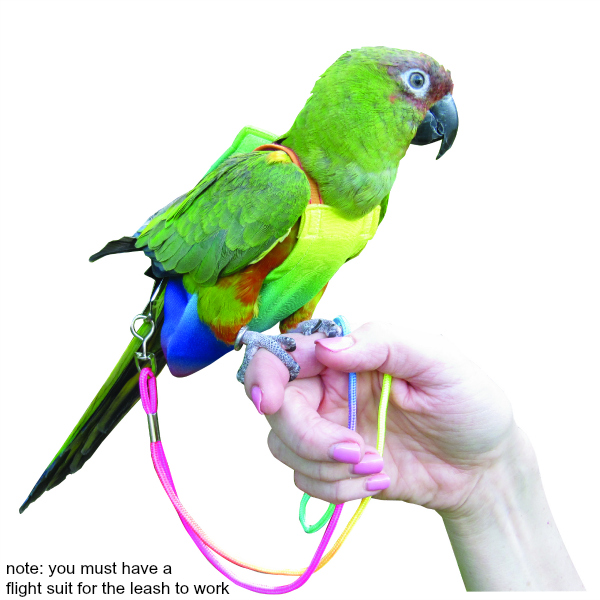
Flight Suits are expertly veiled stretchy, soft, recyclable pet avian “nappies.” They let your plumed companions outside of their enclosures both within and out of place, untroubled from humiliating circumstances (feces). Take the appropriate flight suit gear for smooth to dress in and strip off. It is excellent for a voyage. Porous, accessible to wash the material. You can utilize them again and again for ages. The trademarked “poop-pocket” securely holds excrements away from birds and you.
Liners are marketed individually, which does cleaning the Flight Suit even less regularly.
Leashes that connect to the rear of the suit with velcro (certainly not throughout the bird’s throat or limbs) allow you to bring your bird outdoor without the worry of drifting apart. The leashes are traded independently.
Bird flight suit size chart
Colossal: suits most Larger Blue and Gold, Green Wing Macaws and the like
Jumbo: suits most Greater Sulphur Crested Cockatoos, Moluccan, Citron, and the like
Jr. Small: suits most Baby Green Cheeks, Starlings, and the like
Large: suits most Patagonian Conures, Alexandrine and Moustache Parakeets, Jardines, Maximillian Pionus, Indian Ring Necks, Rainbow Lories, Hahns Macaws, Yellow Collared Macaws, Red Headed, Blue Crown Conures, Mitred, Nanday, and the like
Mammoth: suits most Military, Blue and Gold, Scarlet Macaws and the like
Medium: suits most Red Bellied Parrots, Smaller Lories, Sun Conures, Caiques, Quakers, Cockatiels, and the like
Petite: suits most American Parakeets, Smaller Lovebirds, Pacific Parrotlets, and the like
Small: suits most Baby Cockatiels, Ring Neck Doves, Meyers, African Senegals, Dusky & Jenday Conures, Green Cheeked, and the like
Wide: suits most Timneh Greys, Pigeons, Goffin Cockatoos, and the like
Wide Plus: suits most Crows, Severe Macaws, Rose Breasted Galah and Bare Eyed Cockatoos, and the like
X-Large: suits most Eleonora and Medium Sulphur Crested Cockatoos, Umbrella, and the like
X-Small: suits most English Budgies, Lovebirds, and the like
X-Wide: suits most Lesser Sulphur Crested Cockatoos, Citron, Eclectus Solomon, Amazons, Congo African Greys, and the like
X-Wide long: suits most Grand Eclectus, Vos Maeri, and the like
X-Wide Plus: suits most Cameron Congo, Red Sided Eclectus, and the like
How to Measure Bird
- Rather than measuring tape, which may scare your bird, you can likewise utilize a rope or fabric. Merely sign it and then size it with a measuring stick or a measuring tape. It might be more comfortable as a two-person task.
- Cover around the entire bird (the girth) at the thickest section, though don’t incorporate the plumes in the dimensions (therefore work thoroughly around – same when you are marking your waistline – though beneath their wings.
- Include the length foot of the nape to where the tail plumages start on the body – near the bird’s rear.
How to Put a Flight Suit on a Bird
The subsequent bit-by-bit pointer will assist you and your bird study merely how simple it is to dress a FlightSuit
- Set the bird above the flight suit thumping toes near the gaps.
- Raise elastic leashes to cover wing in upward and over action
- After considerately leading wings within elastic coats, tight Velcro stip. (For a more petite bird, secure Velcro initially, then loosen the plumes)
- Toes might require to be cleared by drawing ‘poop pocket’ onto the tail.
How to Make a Flight Suit
Note: this pattern is for nappies ideas, and doesn’t screen most of the breast
To obtain one, you’ll want:
Paper
Pen
Set of snap pins or velcro ( not for something tinier than an amazon)
Sewing machine
Slim-standard width elastic (roughly 10 cms)
Smooth, light, cotton fabric ( approximately 10 – 12 cms )
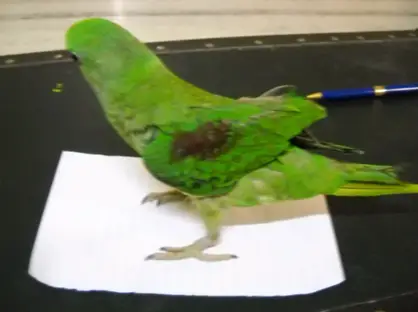
1. Measuring
First, get a journal or clip two scraps of paper unitedly. Bring your bird and put him on the paper; he needs to be pretty docile to arrange this. Use a pen and sketch a small figure beginning from his collar to the root of his end, and redo on the opposite side. You must hold an open section for the front; trace a vertical line attaching both edges of the line appending a measure to the expanse. Therefore if your frame is 10 cms in length, you must connect the lines at 12 cms. Promptly trimmed out the patterns and delicately secure your bird and discern if it requires to be modified. Cut off any ends that appear to be useless, though bear in mind to retain the nappies big enough for your bird to be content. Arrange the equivalent for the front part. Following is simple, formed a long band of fabric nearly 20 cms and trimmed it in half. Put the fractional on your bird’s collars and label where they can take the parts you trim securely. Hold one edge at the collar and brand where the opposite edge must be trim. Hold all these items collectively.
Ultimately, the simplest action, get the leash and pretty gently enclose it around your bird’s tail’s root. Merely over the preen gland or roughly a 3.8 cms from the root. Keep in mind this is for birds the extent of an Alexandrian, for different birds, you will need to cover from zero.
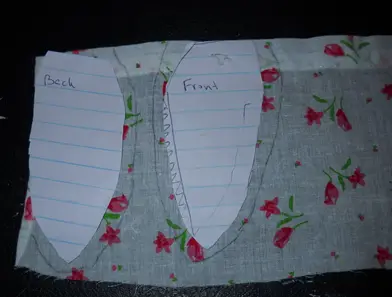
2. Cut Out the Fabric
Therefore now solely you make is get the two frames you created an outline around them on your cloth. Following this draw different frame 1/2 inch away, you will suture this succeeding. Whether you are skilled at tailoring, you can obtain it slimmer. You can mark them exterior and interior if you desire. For the leash, set it on the cloth and formed and sketch double it’s thickness giving a small cloth at the edges so you can suture it too.
3. Start Your Sewing Machines
This is rather straightforward; you merely require suturing the parts. And done. Merely make certain you don’t forget any strands of any kind, particularly if you own a bird that prefers to gnaw. Attempt to make it as adjacent to the edge as practicable leaving the least probable margin. Strive not to do it too dense at the edge.
4. Putting It All Together
Primary, you connect both the leashes to merely one part. Make certain they view the corresponding side , which implies outward to outward, and inside to inside. Then stitch on the opposite part too, tailor the leashes at the end of the parts. Make certain to check them on your pet initially to make sure it suits appropriately.
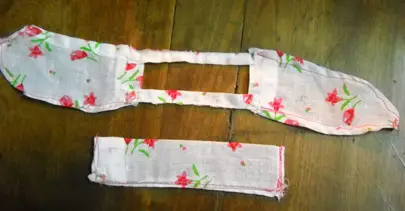
Then stitch the elastic to the part of fabric by securing one of the leashes tips within one edge of the fabric, creating a pouch neglecting one edge loss. Stitch the side up likewise, then tailor this to one surface of the front part.
Presently you need to hand tailor one of the snap clips to the loose edge of the leash meeting the interior of the outfit. Stitch the opposite to the different surfaces on the opposite edge.
5. Suit it Up
Place it on your bird by setting it above his cranium, so the leashes get on his collars and become inserted in his wings. Push the anterior part within his toes and snap the leash around the edges of the cuts. This must be precise and tight. For the nappies, you can stitch the square of cloth to the front part. Or you can bind it there and adjust it whenever you want it. Therefore, here you are, have an eye the initial moment you make him dress it and oversee if you’re dropping him for a period.